Creating Report - Custom Code
This chapter requires you development environment to be configured properly (see setup developer environment) and non free tariff (see Tariff activation chapter).
Coding step (Custom Code)
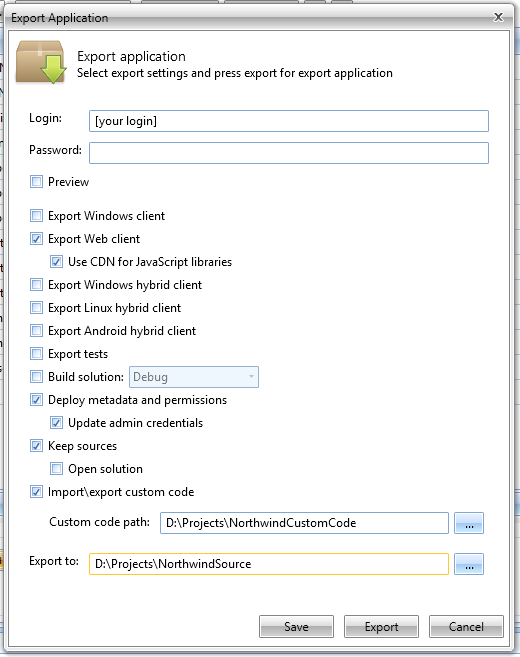
First get a source code by selecting Build->Export in main menu.
Set export parameters as shown below an fill your login and password (on how to create a Code Cruiser account see Creating Account chapter).
You can set any desirable values for Custom Code Path and Export To but notice that these should be completely separate folders (should not include each other).
Currently we have no Custom Code but we need to specify it to help Code Cruiser configuration utility extract Custom Code later.
At the end of the process you will get fully functional source code of your application.
Go to "..\NorthwindSource\Sources" and open Northwind.sln in Visual Studio.
Find ReportsService class. Notice that it contains PrintOrderAction we added in configuration.
(!) Read Code Behind chapter for more details on file and class structure.

Replace file contents with report call implementation:
using System.Collections;
using System.Collections.Generic;
using System.Linq;
using BusinessFramework.Contracts.Actions;
using BusinessFramework.Contracts.Reporting;
using Northwind.WebAPI.Contracts.Reporting;
using Northwind.WebAPI.Contracts.Repositories;
using ReportingFramework.Central.Contracts.Reports;
namespace Northwind.WebAPI.ActionServices
{
/// <summary>
///
/// </summary>
public sealed class ReportsService : CodeBehind.CodeBehindReportsService
{
private readonly IOrderDetailsQueryRepository _orderDetailsQueryRepository; // order details query repository
private readonly IReportDataExtractor _reportDataExtractor; // prepares data container for a report
private readonly IReportingService _reportingService; // service that creates reports
private readonly IOrdersRepository _ordersRepository; // order entity repository
public ReportsService(IOrderDetailsQueryRepository orderDetailsQueryRepository,
IReportDataExtractor reportDataExtractor,
IReportingService reportingService,
IOrdersRepository ordersRepository
)
{
_orderDetailsQueryRepository = orderDetailsQueryRepository;
_reportDataExtractor = reportDataExtractor;
_reportingService = reportingService;
_ordersRepository = ordersRepository;
}
/// <summary>
///
/// </summary>
/// <param name="orderId"></param>
public override ActionResult<Report> PrintOrderAction(int orderId)
{
var orders = _ordersRepository.Set().Where(o => o.Id == orderId).ToList(); // get Order data from entity repository
var sources = new Dictionary<string, IEnumerable>(); // create container for report datasources
sources.Add("Data", orders); // add data to container
var details = _orderDetailsQueryRepository.Set().Where(o => o.OrderID == orderId).ToList(); // get Details data from Query
sources.Add("Products", details); // add data to container
var data = _reportDataExtractor.GetData(sources); // prepare data for report processing
return new ActionResult<Report>()
{
Data = _reportingService.GetReport("OrderInvoice", data, ReportFormat.Pdf, "OrderInvoice") // create a report and return the result
};
}
}
}
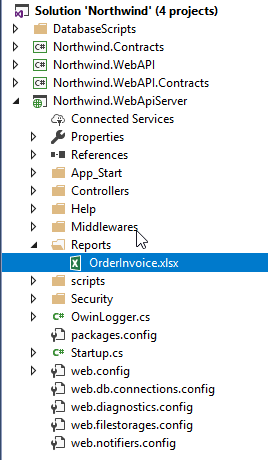
Download Order report template here. and include it into Northwind.WebApiServer project under Reports folder (path to report templates could be changed in web.config).
(!) See Reports chapter for information about report templates.
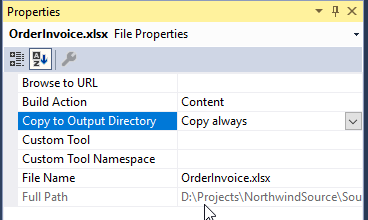
Make sure its Copy to Output Directory property is set to Copy always.
Close Visual Studio and go back to configuration utility.
Press Extract Custom Code button.
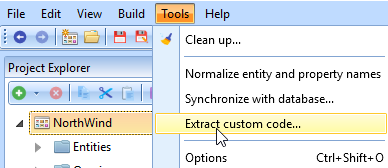
Check the paths are correct and press OK.
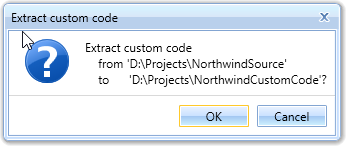
In ..\NorthwindCustomCode folder you will get the difference between you original source code and code you created in Visual Studio (read more in Custom Code and Code Behind chapters).
Now each time you start project export Code Cruiser will add your custom code to exported one.
That means you can develop you configuration without loosing any code modifications you already made.
Off course if you change altered objects name in configuration your Custom Code will stop working and you'll need to open Visual Studio and fix naming then run Extract Custom Code.
Created with the Personal Edition of HelpNDoc: Create iPhone web-based documentation